On this page
Using Scanlily, you can make your items available online for checkouts and reservations.
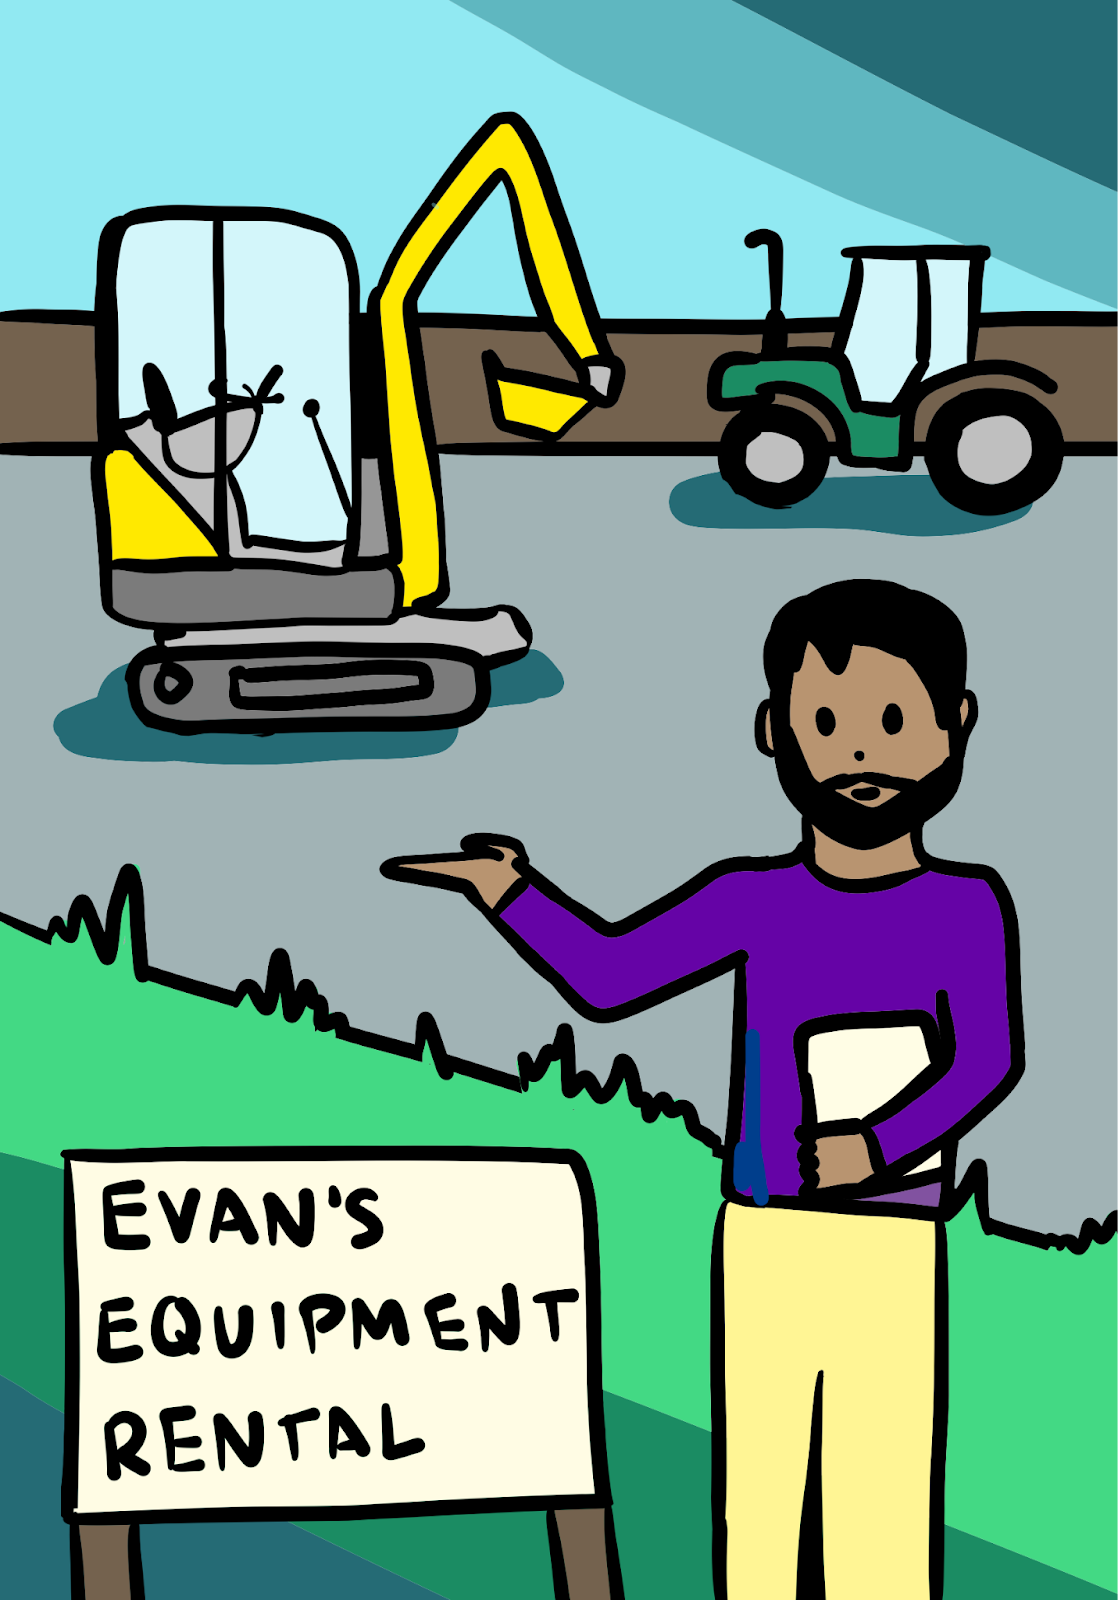
Scanlily easily lets you create a reservation system for anything you can put a QR sticker onto. Here are some examples.
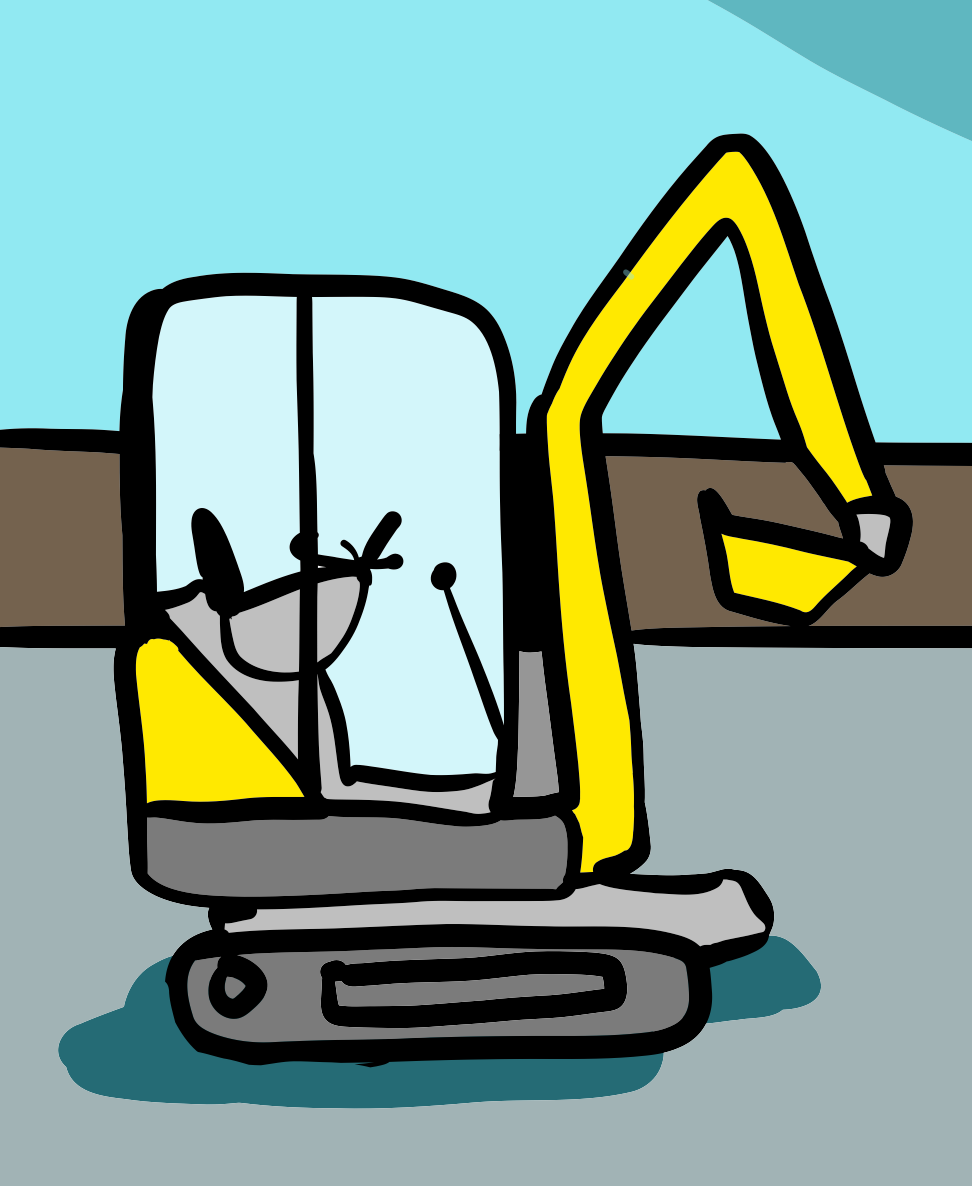
Equipment
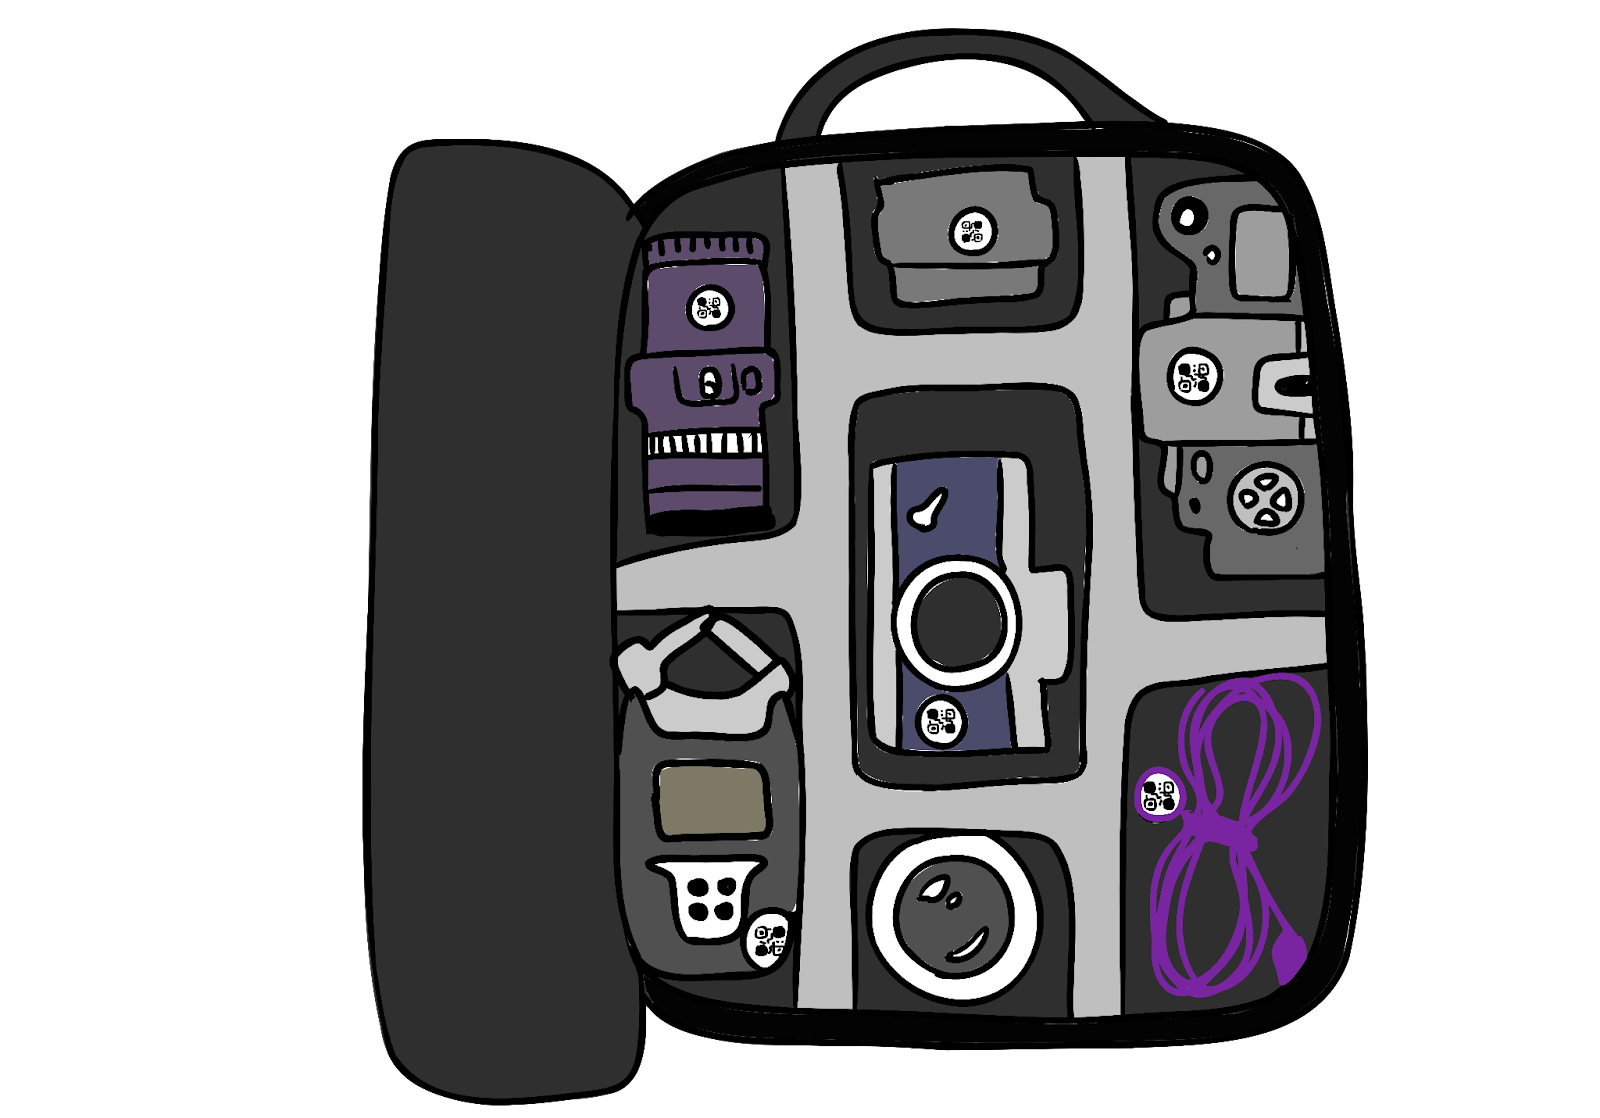
Tools

a. Booking Modes - Summary and State Diagrams
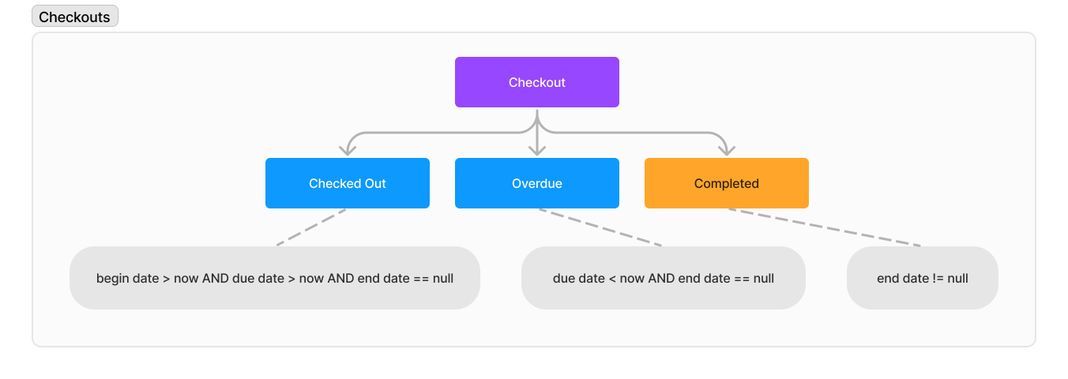
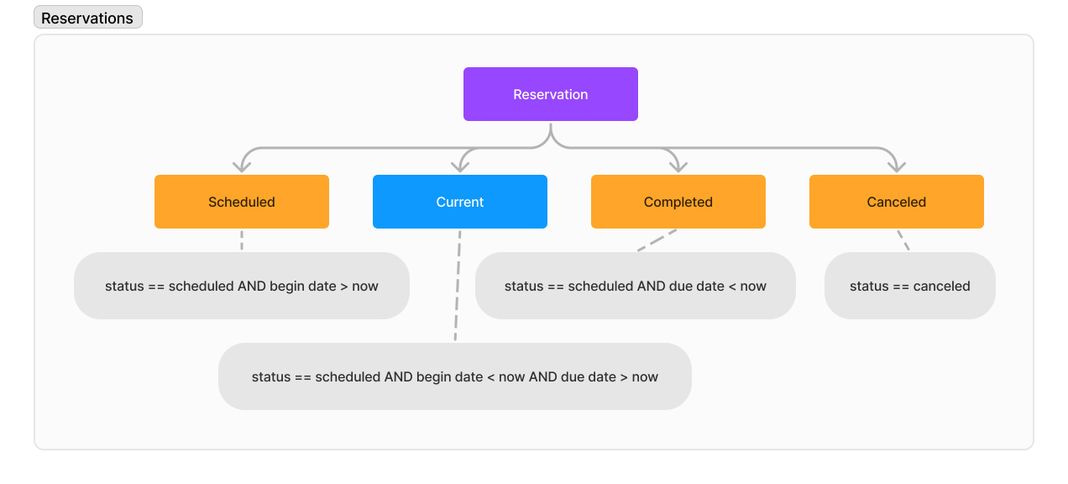
There are three Booking Modes: Checkout Mode, Reservation Mode, and Reservation with Pickup Mode.
We encourage you to start with the simplest mode that best fits your use case. The most complex mode, Reservation with Pickup, has aspects of the other two modes built-in, so it should cover the more sophisticated use cases.
a1. Checkout Mode Summary
The Checkout Mode is akin to checking out books from a library. The states for your items are Available and Checked Out. You can see who has checked out which item.
The following is a state diagram for checkout mode and the status shown to the users.
a2. Reservation Mode Summary
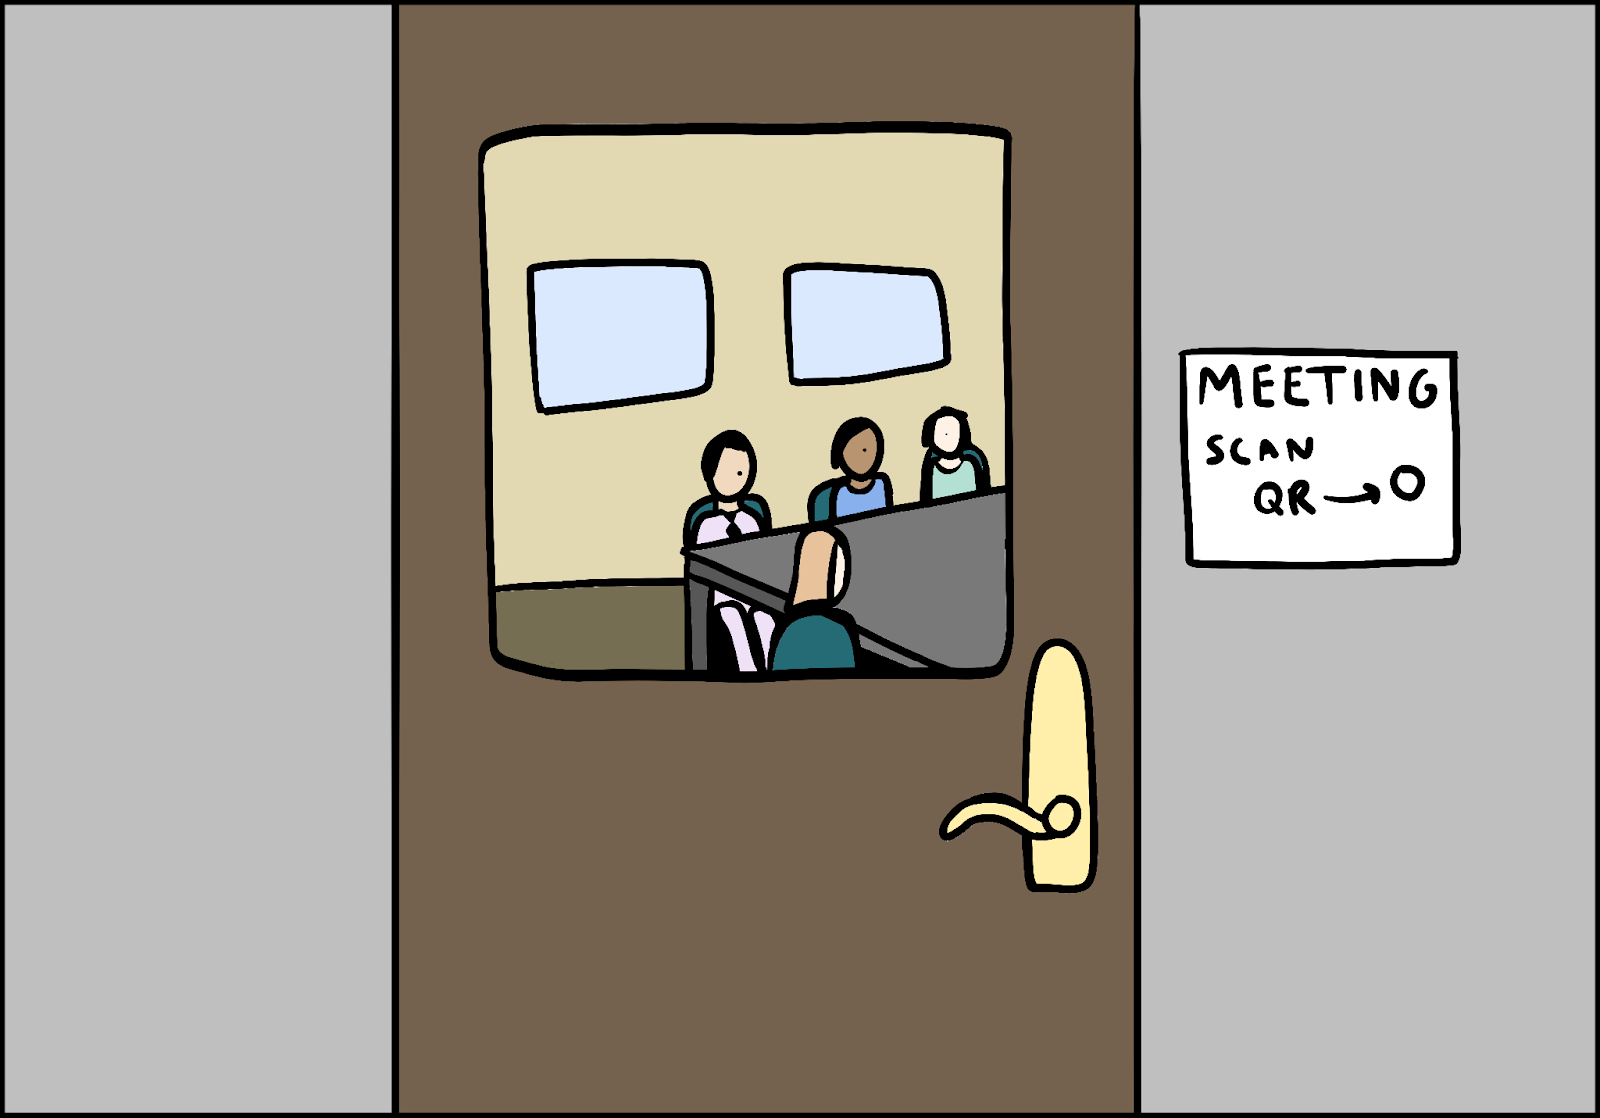
Reservation mode works like reserving a meeting room. Users reserve an item on the calendar.
They get an email reminder when the reservation is about to begin. Other users in the system can see a calendar of future reservations.
The following is a state diagram for Reservation Mode and the status shown to the users.
a3. Reservation with Pickup Mode Summary
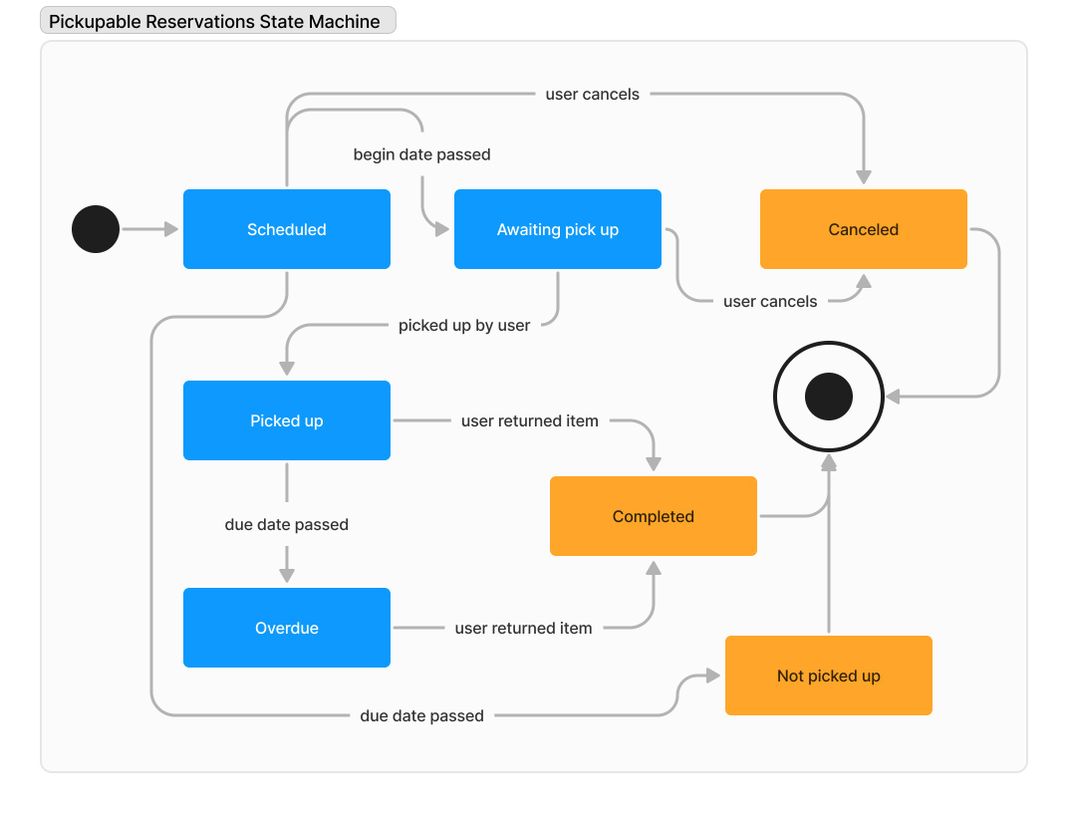
Users reserve the item on a calendar. When they come to pick up the item, they can scan it and pick it up in the system. When users (hopefully) return the item before it is due, they can scan it to return it. The pickup mode has various notifications like a reminder to return the item or a notification to alert the reserver and you if items are overdue.
The following is a state diagram for Reservation with Pickup Mode and the status shown to the users.
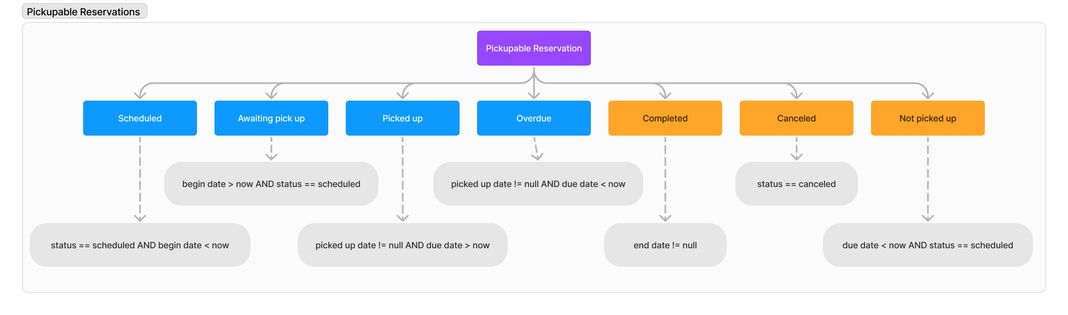
The following is a state diagram for Reservation with Pickup Mode and the status shown to the users.
a4. Changing Modes:
It’s possible to switch modes midstream if needed.
It’s not possible to have two modes at once on one account but you can have more than one account. There are advanced possibilities of two accounts sharing the same items. Contact Us if that is something you require. A note about switching modes when you have future bookings: those future bookings will be hidden until you switch back to that mode. Therefore if you are switching from a mode, make note of open bookings you might have. Close them if possible before switching. Use the Settings->Subscriber screen to change the booking mode.
b. Checkout Mode
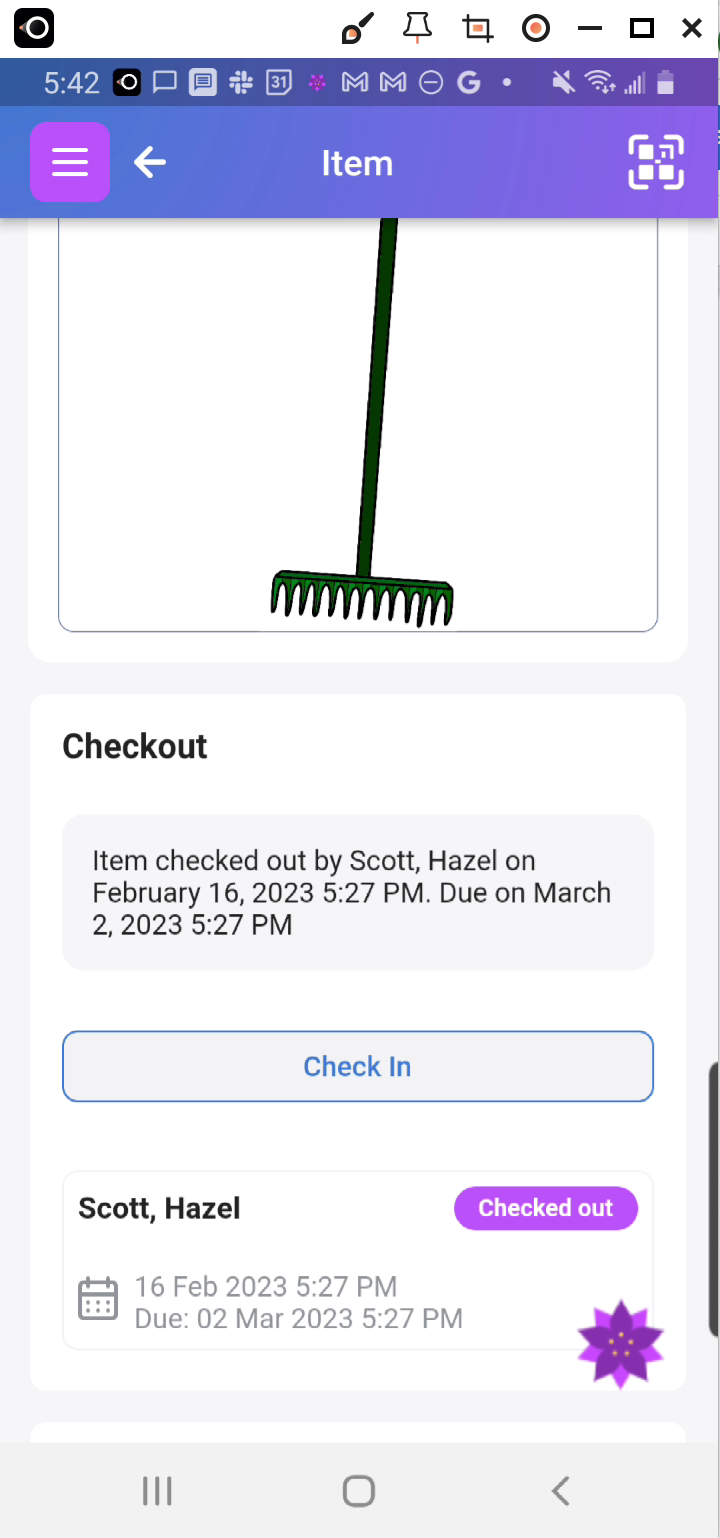
In Checkout mode, borrowers are given due dates by which they must check their items back in. Users can scan the QR on the item when they check it out and scan it again when they check it back in. They can also change the checkout status without scanning by visiting the Item Page. As the bookings administrator, you will always know who has your items. Participants will be reminded when their item deadline is almost due and notified if they are overdue.
You might use Checkout Mode when you want to keep track of who has which item checked out, but don’t want to burden users with reserving upfront.
Using our garden tools example, let’s say we want to check out a Garden Rake.
From the Item Page, click on the Check Out button.
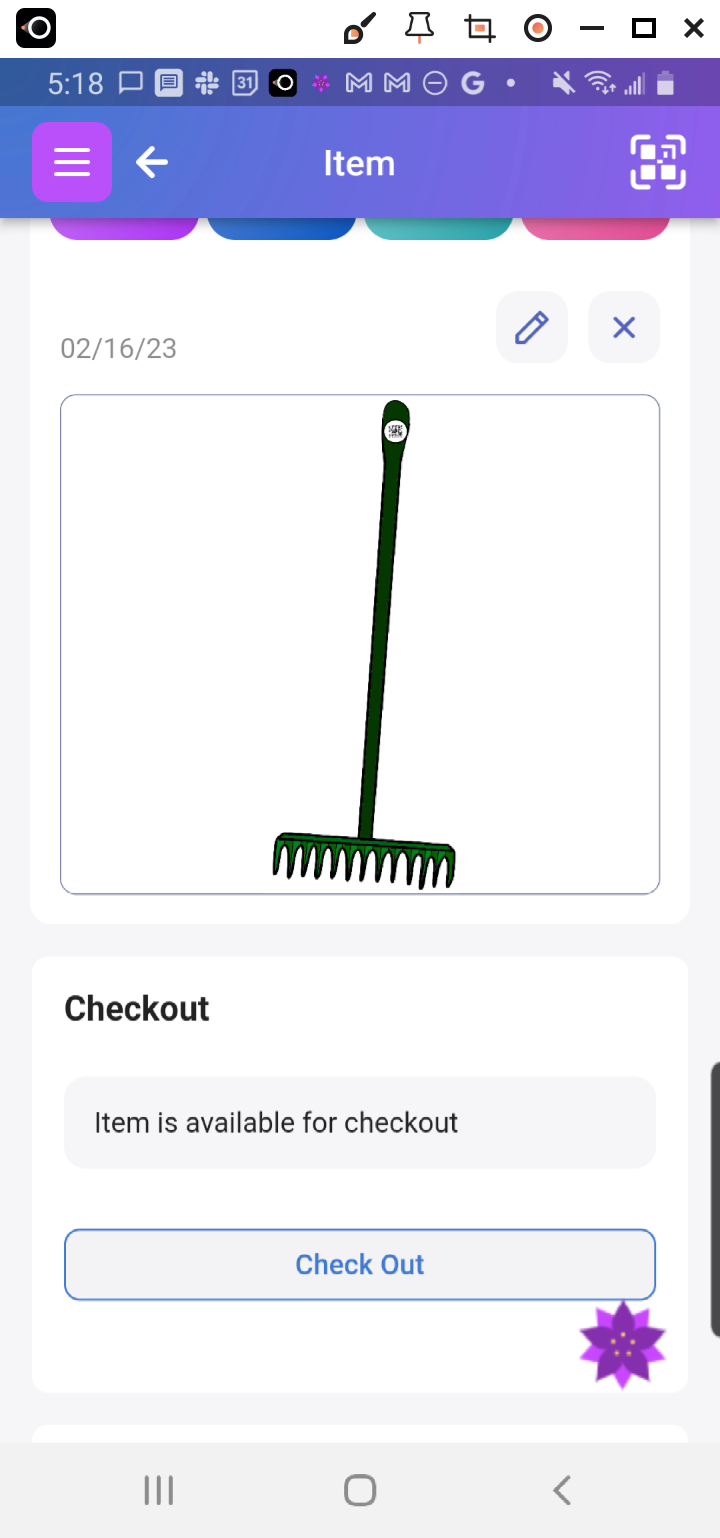
On the next screen, you would simply click on Checkout:

You can see the booking number on this page and the item's due date.
A superuser or administrator of a Pro or Business subscription can also check the item out on behalf of another team member.
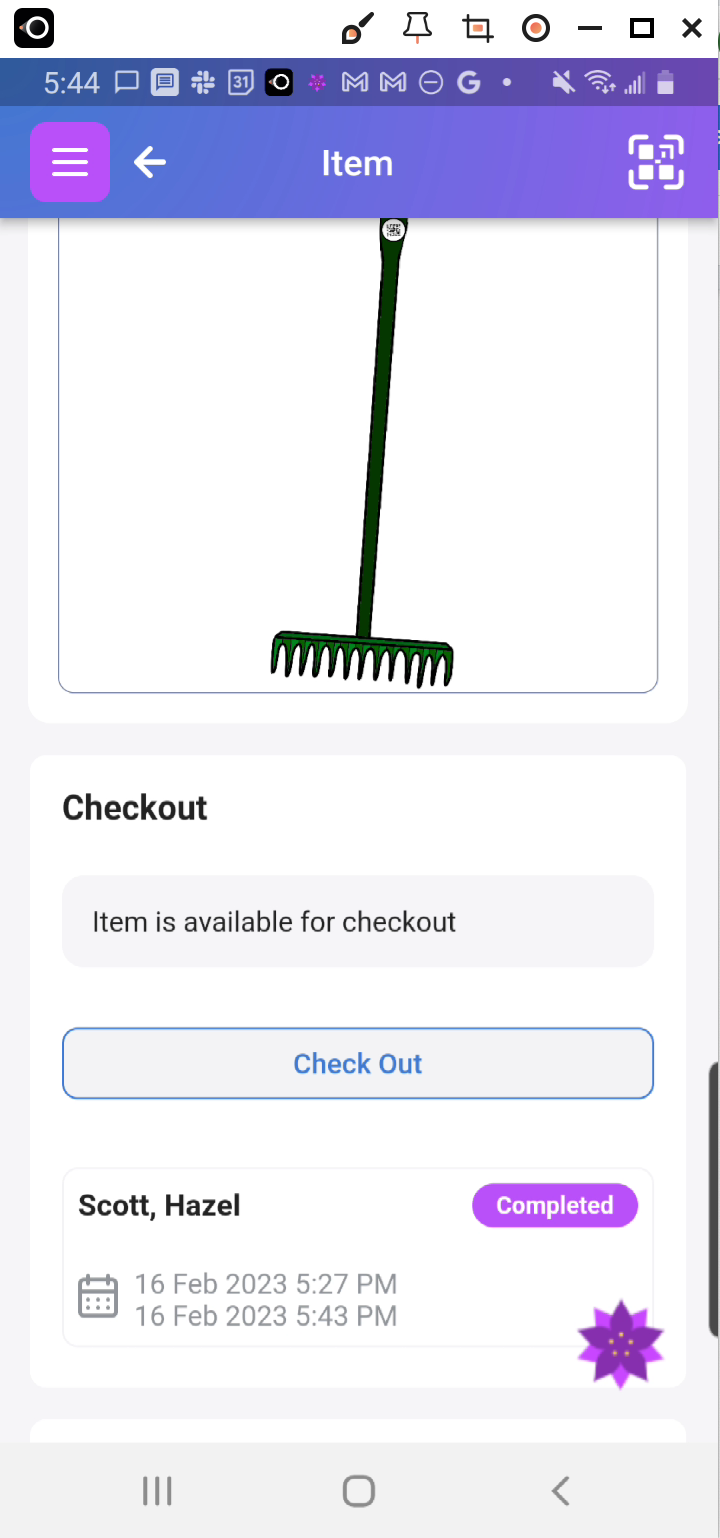
When you are ready to return the item, simply click Check-In on the Item Page.
After doing that, the Item will be available to check-out again:
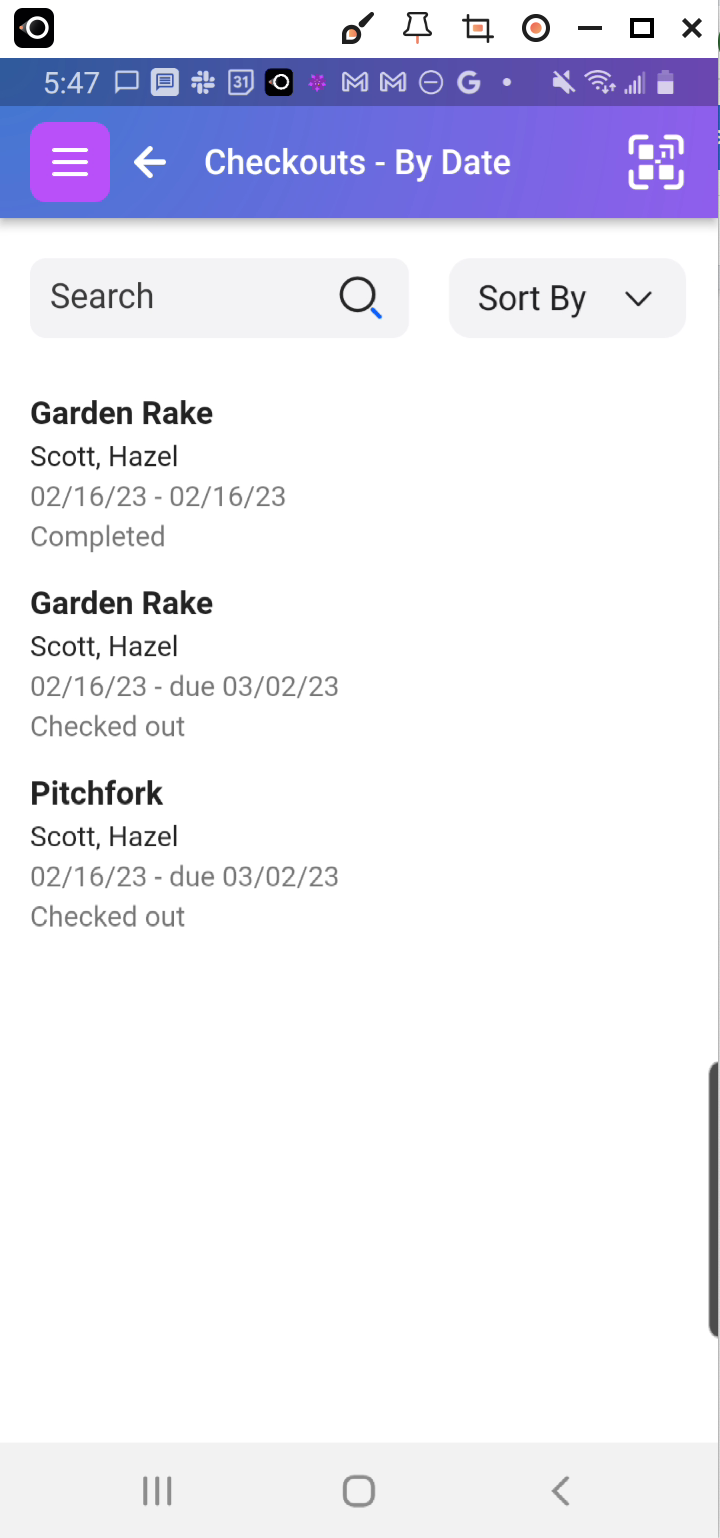
To see the list of currently checked-out items, select the upper left Home menu to go to the Dashboard:
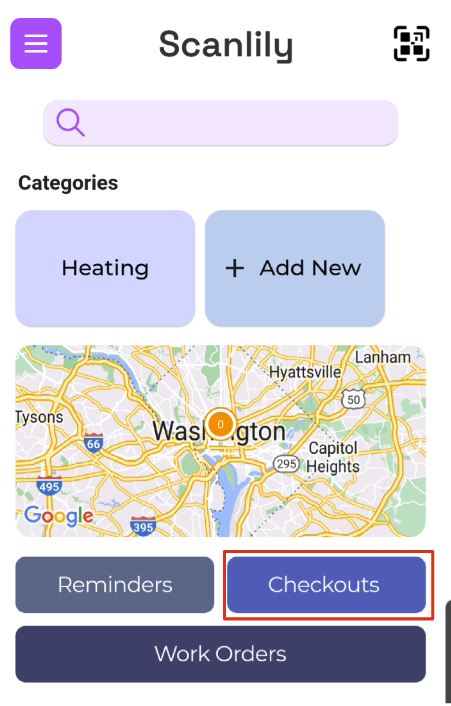
To see the list of your checkouts, click Checkouts from the home page menu.
c. Reservation Mode
If you need to reserve an item for a specific period of time, but don’t want to require your users to have to scan when they pick up or drop off items, use Reservation Mode.
Reservations on Scanlily work like a conference room reservation. Users can reserve an item upfront.
Reservation mode is useful when you have items that other people pick up, and you want to avoid the complexity of tracking the picking up and dropping off of the items.
You can have your users reserve equipment online themselves via the Scanlily app or website, or the users contact you, and you reserve it for them.
—--
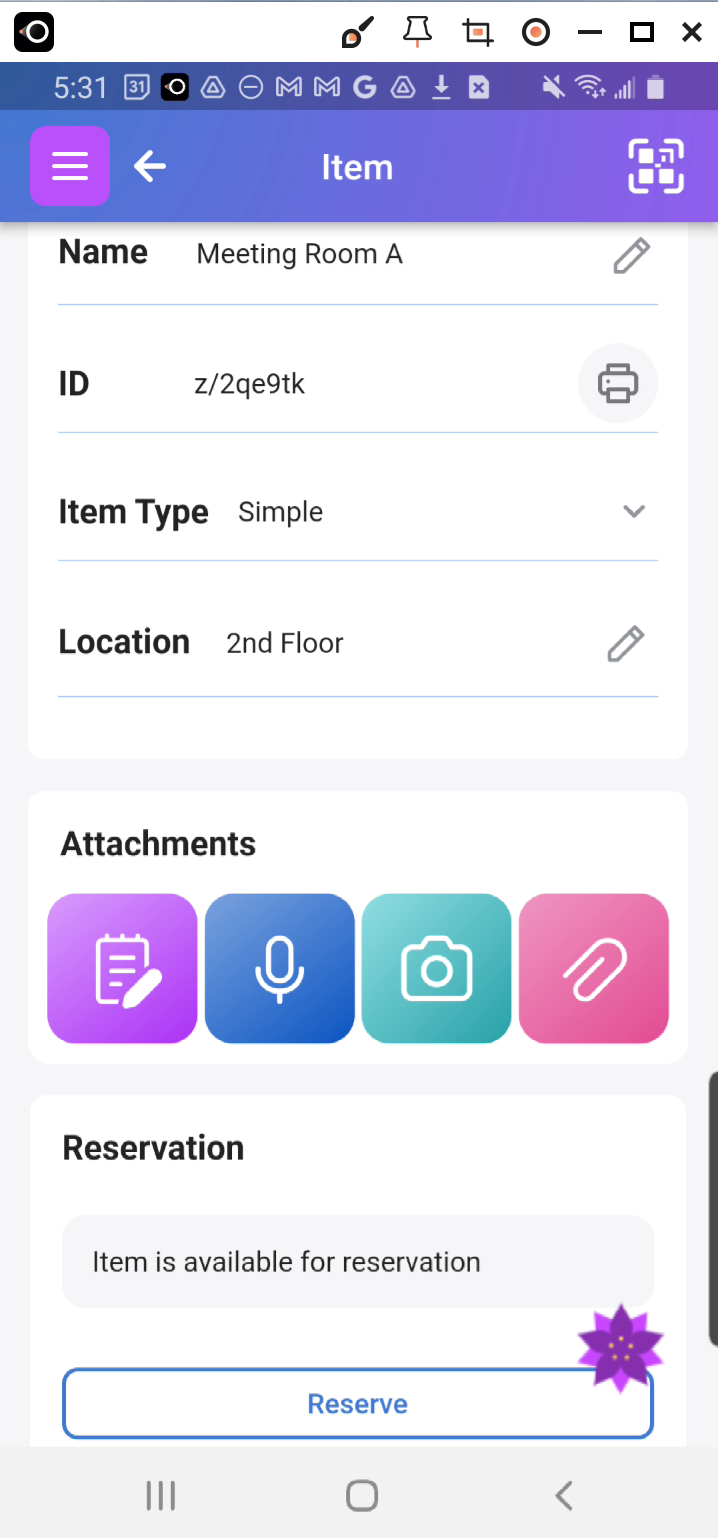
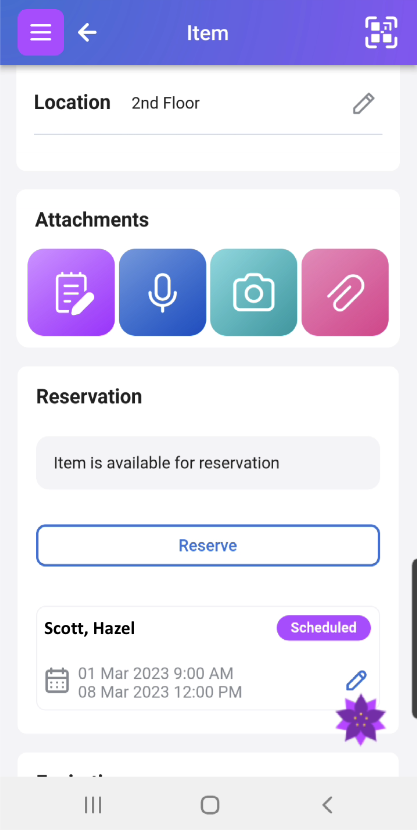
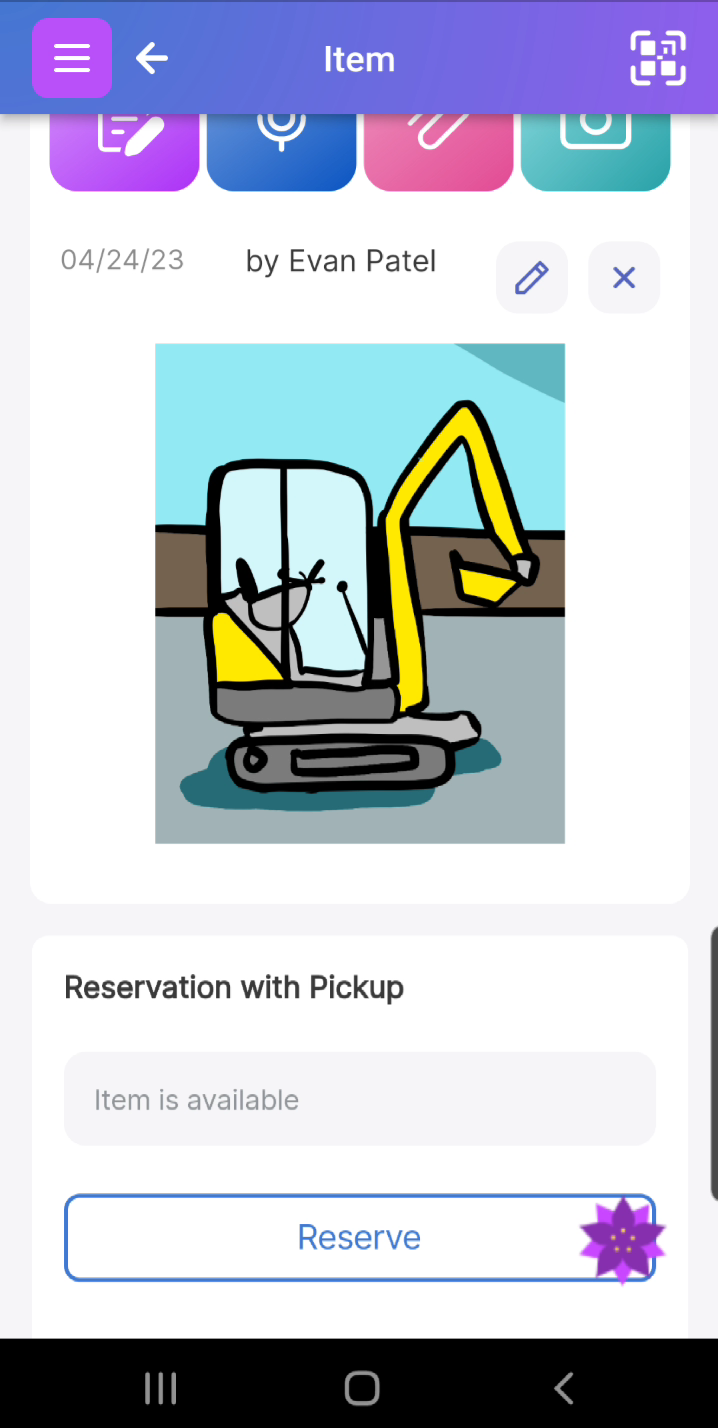
If an Item is available for reservation, it will say so at the bottom of the Item Page. Click on Reserve:
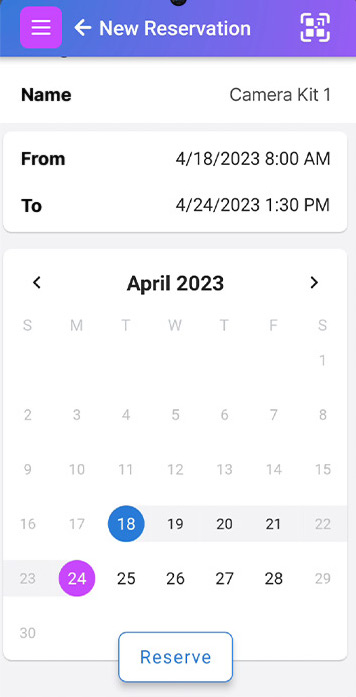
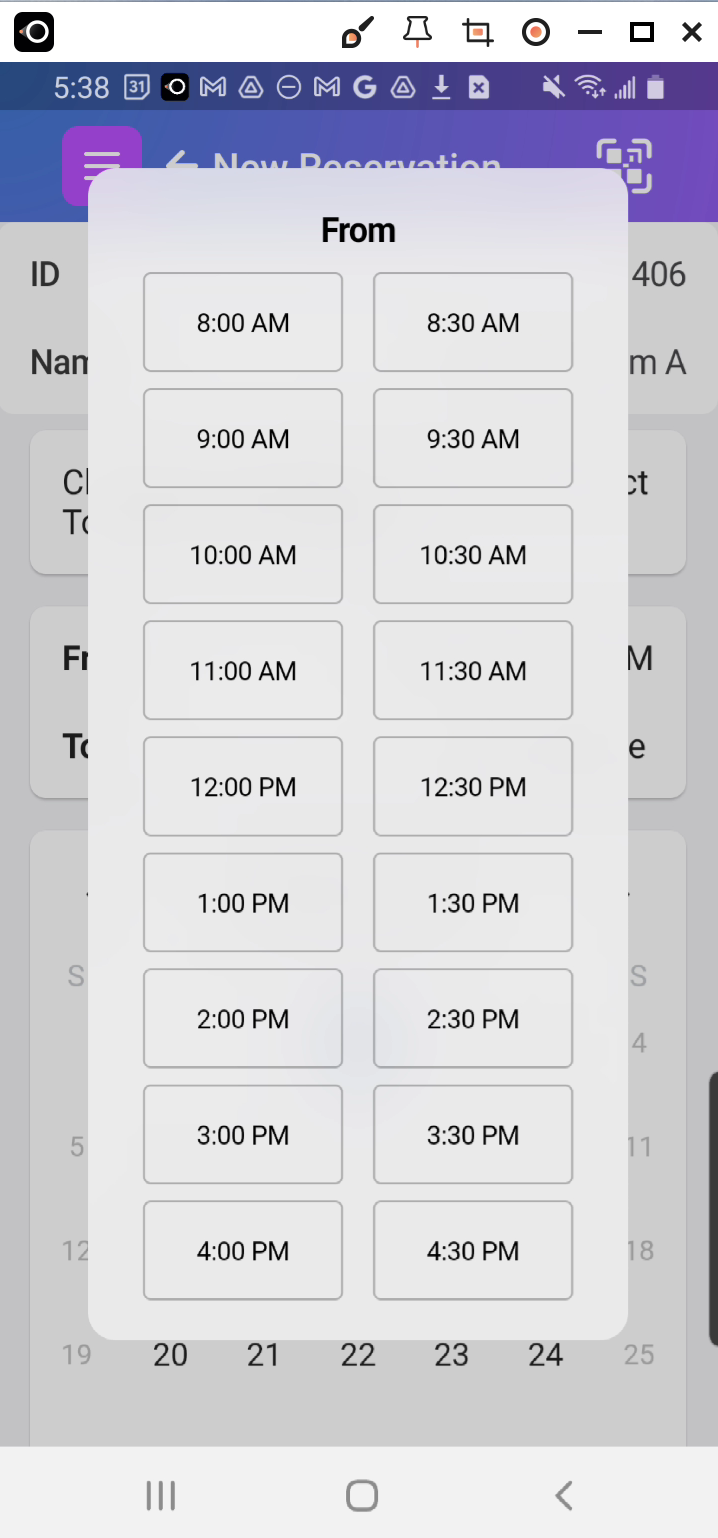
You will be presented with a Calendar. Pick the From date. Optionally, click on the Begin time.
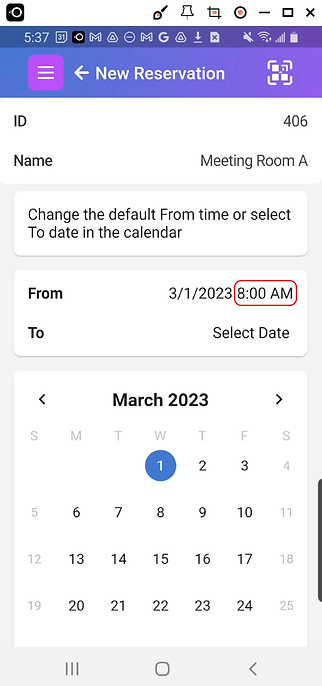
Selecting the time will present you with available beginning times for that day:
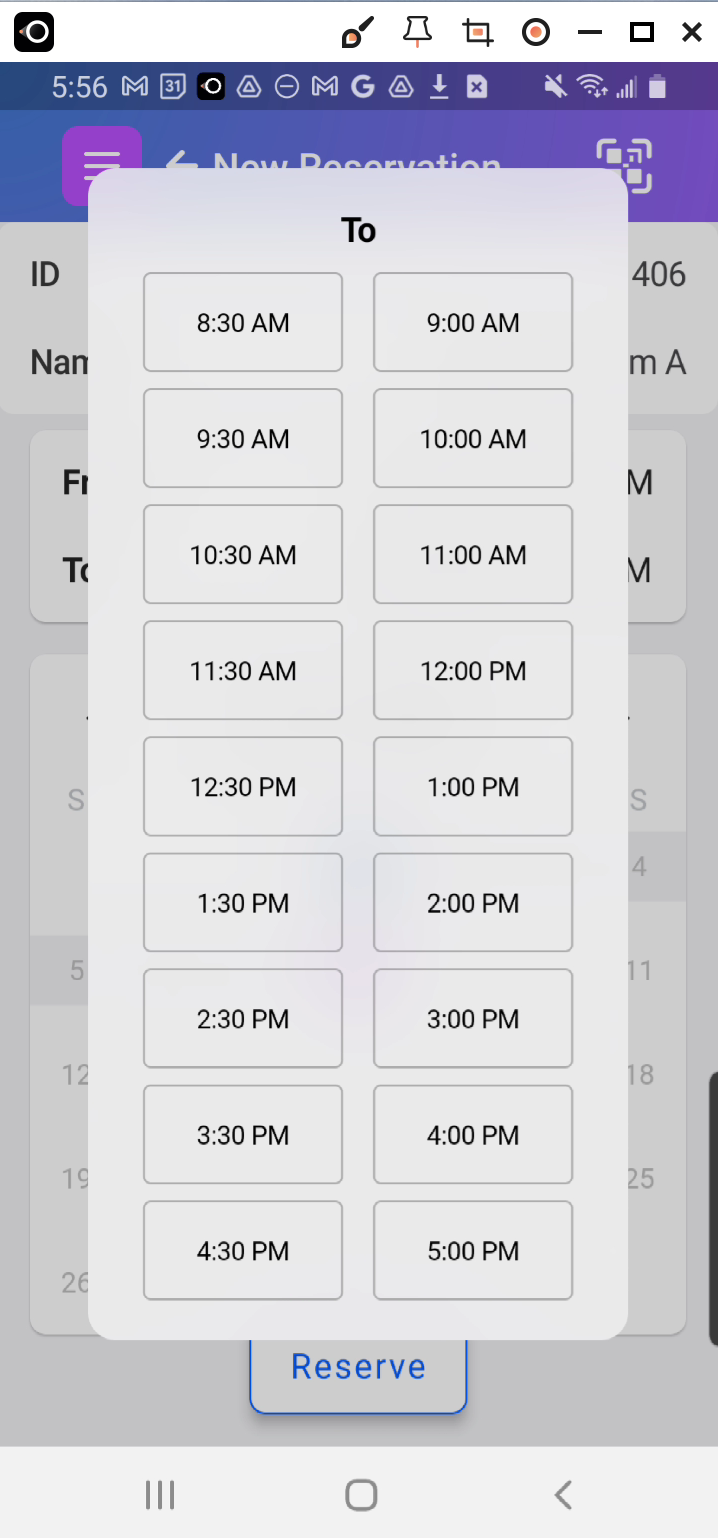
Then select the end of the reservation period and select Reserve.
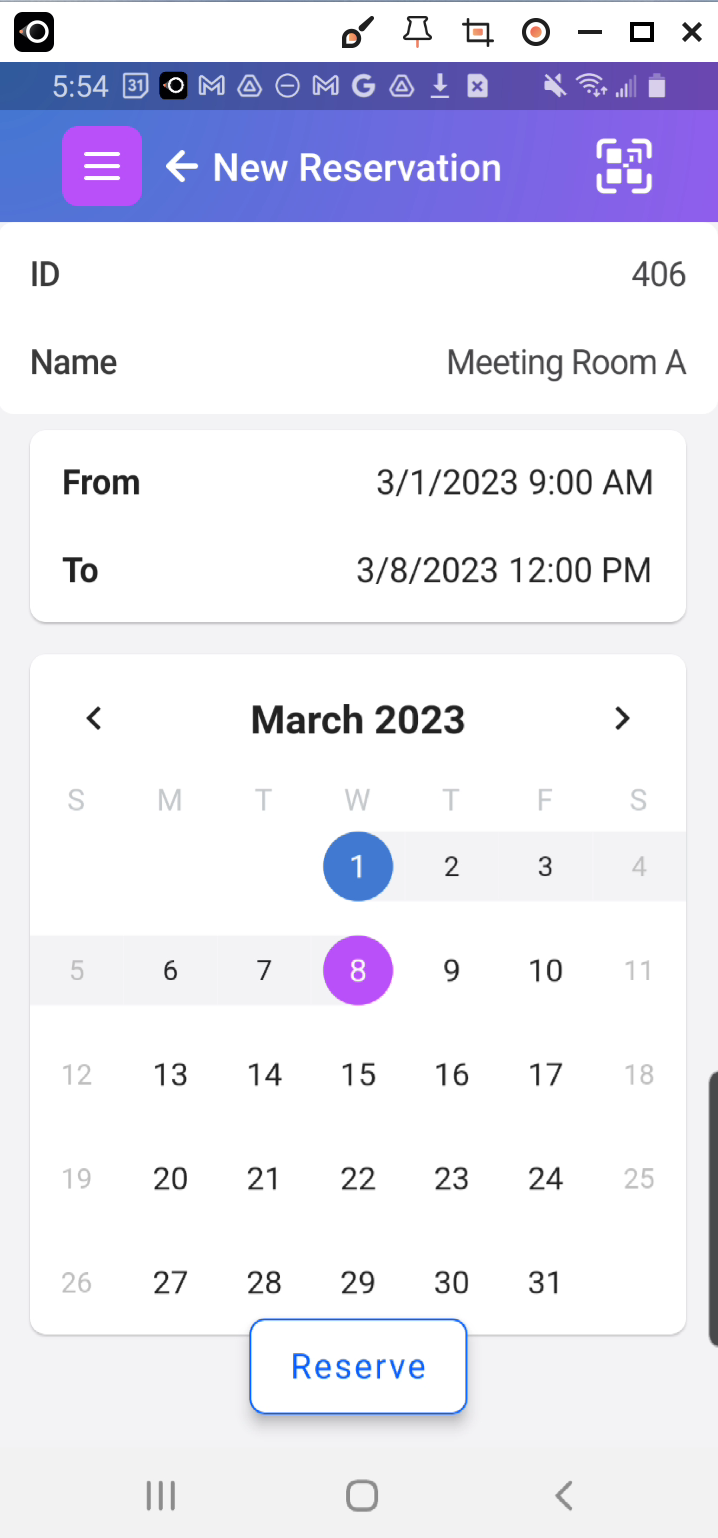
You will be prompted for the time of day timeslots:
The Item will remain available for reservation for times outside the reservation period. You will receive email notifications for when the reservation is about to begin and also when it is about to end.
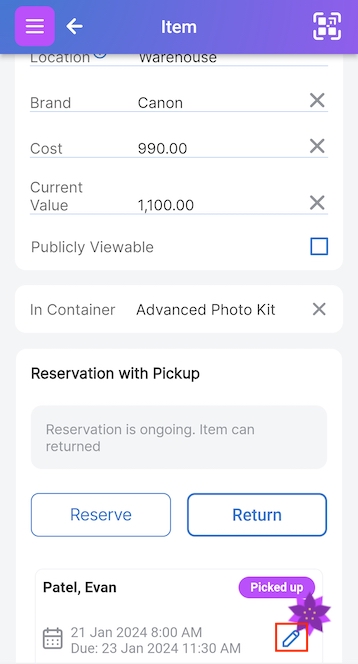
d. Reservation with Pickup Mode
Reservations with Pickup Mode - reserving and tracking item check out and check in
Like in other reservation modes, users reserve equipment online. When they arrive to pick up the equipment, you or they scan the QR code on the item to confirm the pickup. The item’s QR code is scanned again to confirm return when they return.
If your business revolves around people reserving and checking out valuable equipment, then the Pickup Mode is for you. Although it has more steps than the other two modes, it lessens administrative burden because it automates the hassle of keeping track of who has picked up or returned an item.
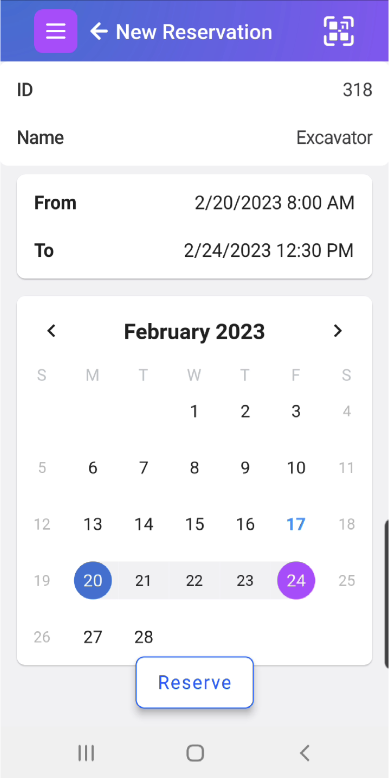
Start the process by selecting Reserve from the Item Page:
Then click on the calendar below to select a reservation start date. Note that you can only pick a future date.
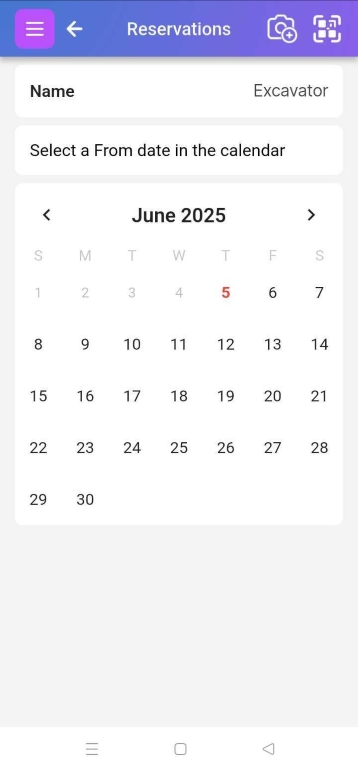
Optionally, you can adjust the start time of the day by clicking on the From time text.
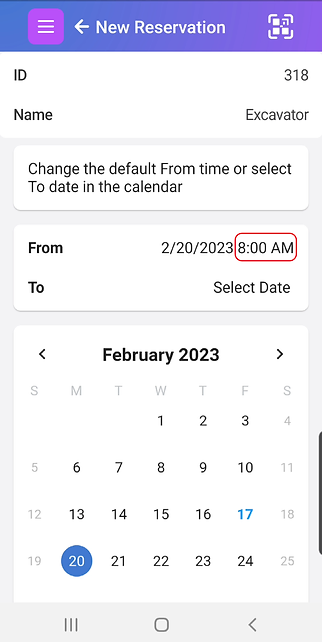
The next step is picking an end date and time. Then click reserve:
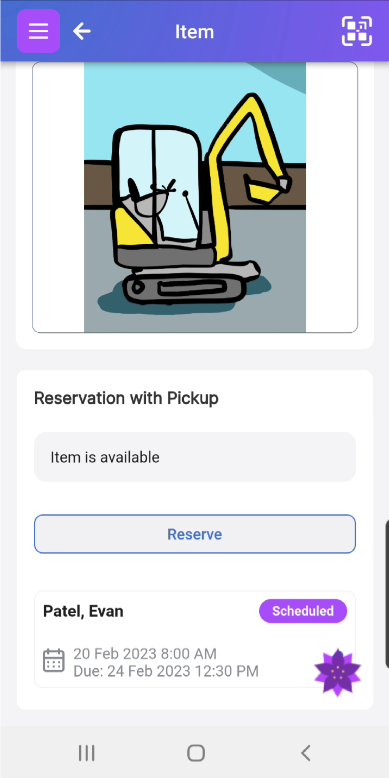
If your reservation hasn’t started yet, you or others can continue to reserve before and after that reservation. It is why the Item may appear as available:
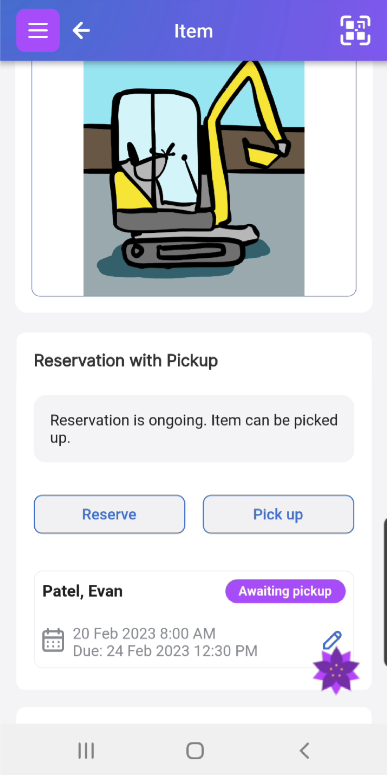
Once your reservation starts, click Pick Up to indicate that you have the item. You’ll get an email reminder as the end of your reservation approaches. You or others can also reserve it for a while outside your reservation.
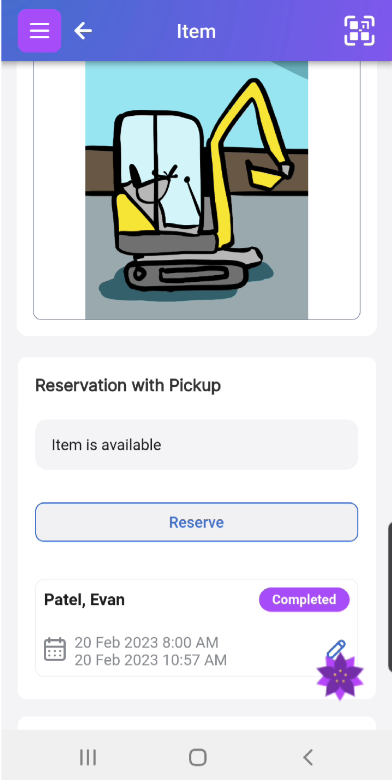
Now it’s time to return the item, so click Return.

The reservation now appears as ‘Completed,’ and the item is available for new reservations.
e. Presenting a Booking Agreement and Collecting Signatures
Scanlily allows Business-level subscribers to present a booking agreement to users and require a signature:
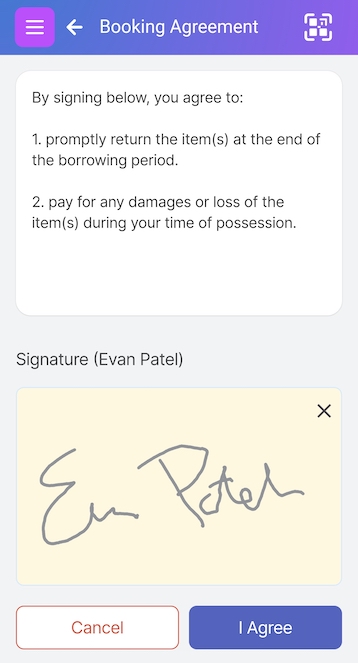
The booking agreement is shown at a different point in the booking process depending on the mode:
Checkouts
For Checkout Mode, users are presented when they check out the item.
Reservations
For Reservation Mode, users are presented when they reserve the item.
Reservations with Pickups
For Reservations with Pickups mode, users do not see the signature prompt when they reserve, but rather they receive it when they come to pick up the item (when they click on the Pickup button).
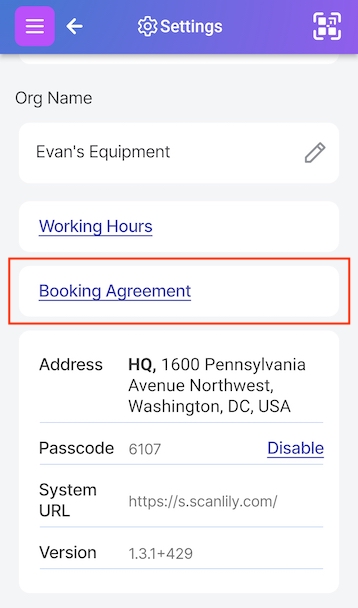
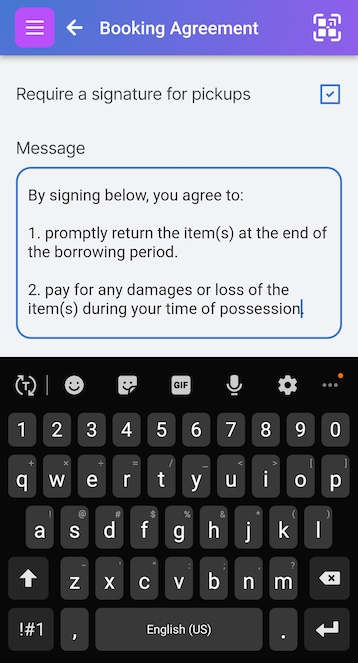
f. Enabling the Booking Agreement and Signature Requirement
You can enable the signature feature from the Booking Agreement link on the Subscriber Settings page:
The resulting screen allows you to enable or disable the signature requirement and customize the booking agreement.
g. Viewing the Signatures
Supervisors and Administrators can view a signature for a booking by clicking on the edit pencil next to the booking on the Item Page: